
How to chat with data in Snowflake using ChatGPT, dbt, and Streamlit
Unleash the Power of Chatting with Data: A Deep Dive into Snowflake, ChatGPT, dbt, and Streamlit In the era of …


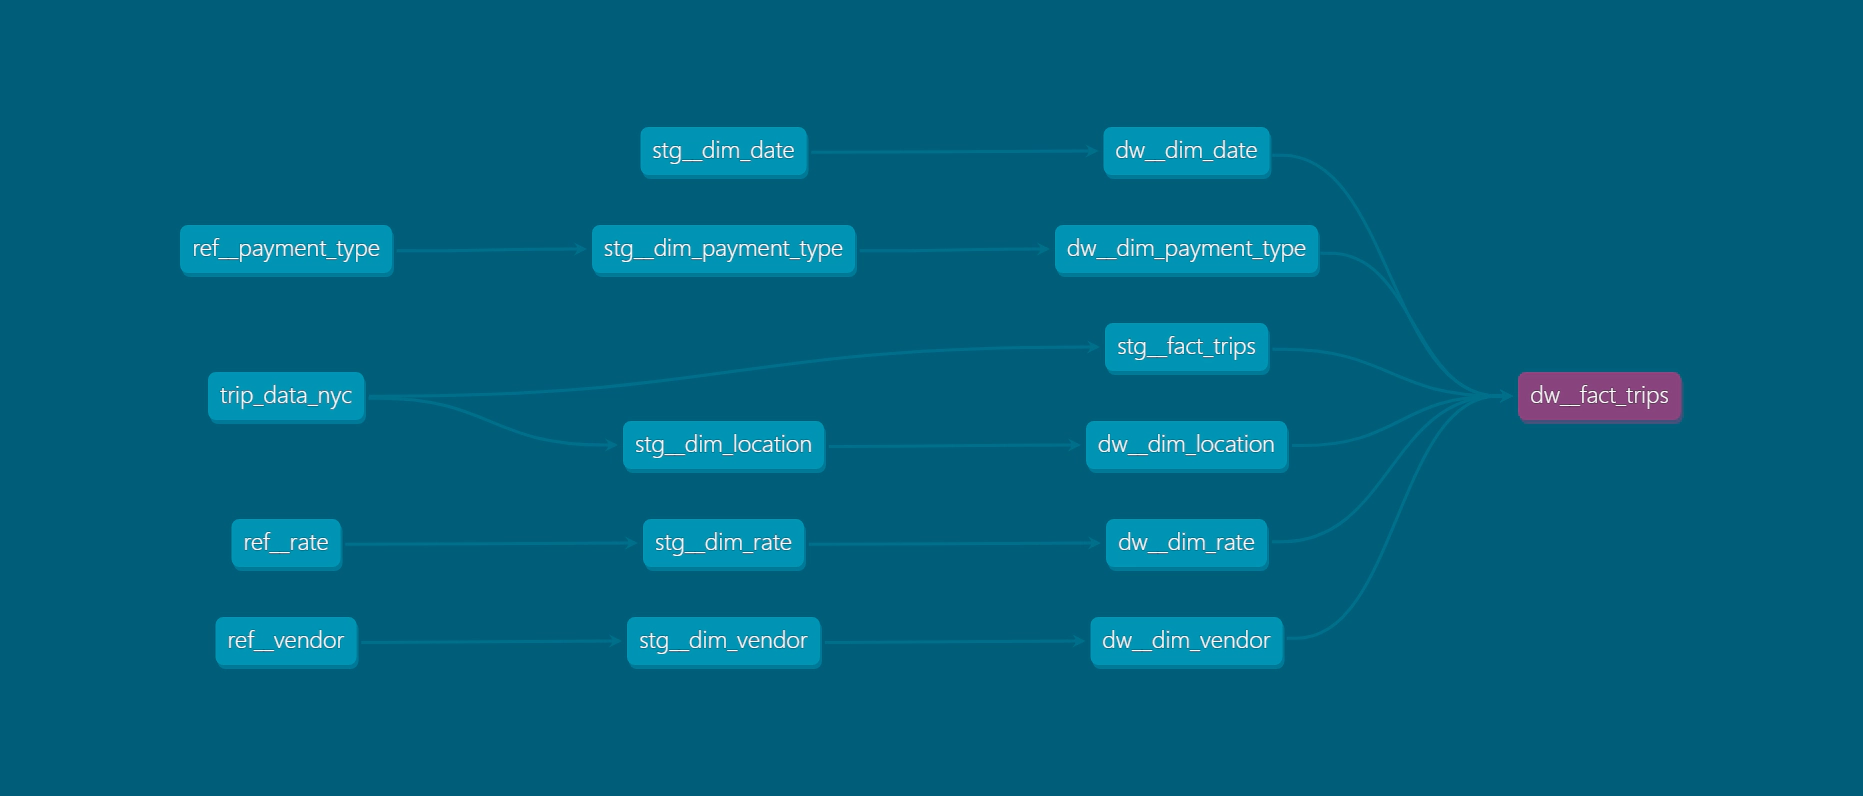
dbt (data build tool) is a popular open-source tool used for transforming data in your data warehouse. dbt Docs is an essential part of dbt, providing a user-friendly and interactive documentation interface for your dbt projects. In this comprehensive guide, we’ll explore various hosting options for dbt documentation, each catering to different needs and offering unique features. Whether you’re aiming for a simple setup or require advanced access control, we have the right solution for you. If you are a dbt Cloud user, dbt docs are available by default at the end of each job run. However, to avoid the need for allocating a dbt license just to view the documents, I would prefer using one of the below hosting options.
Here are the hosting options we’ll discuss:
While this guide is specifically focused on hosting dbt documentation, the principles and approaches discussed can be applied to host any static website. Let’s explore each platform in detail to find the best fit for your hosting needs!
The code used in this article can be found here.
Before proceeding with the hosting options, make sure you have the following in place:
Docker: Download and install Docker for your platform. If you don’t have it already, you can find installation instructions here. Required only if you are planning to host in AWS.
dbt Project: This guide assumes that you already have a working dbt project. If you don’t have one, you can use the demo dbt/Snowflake project from this link for reference. However, this document does not cover the detailed setup process for a new dbt project.
Snowflake Account: To follow the examples, you’ll need access to a Snowflake account. If you don’t have one, you can create a Snowflake account for demo purposes by following the instructions here. Create the database, schema, warehouse, user, and role by running the SQL here.
Netlify Account: Create a Netlify account by signing up here. Required only if you are planning to host in Netlify.
Terraform: We will be creating the required AWS resources using Terraform. It’s beneficial to have a basic understanding of Terraform’s concepts and syntax to follow the deployment process effectively.
By having these prerequisites in place, you’ll be all set to explore the various hosting options for your dbt documentation.
Regardless of the dbt docs hosting option you choose, we will utilize GitHub to host the repository.
Start by creating a new GitHub repository and adding your dbt project to the repository.
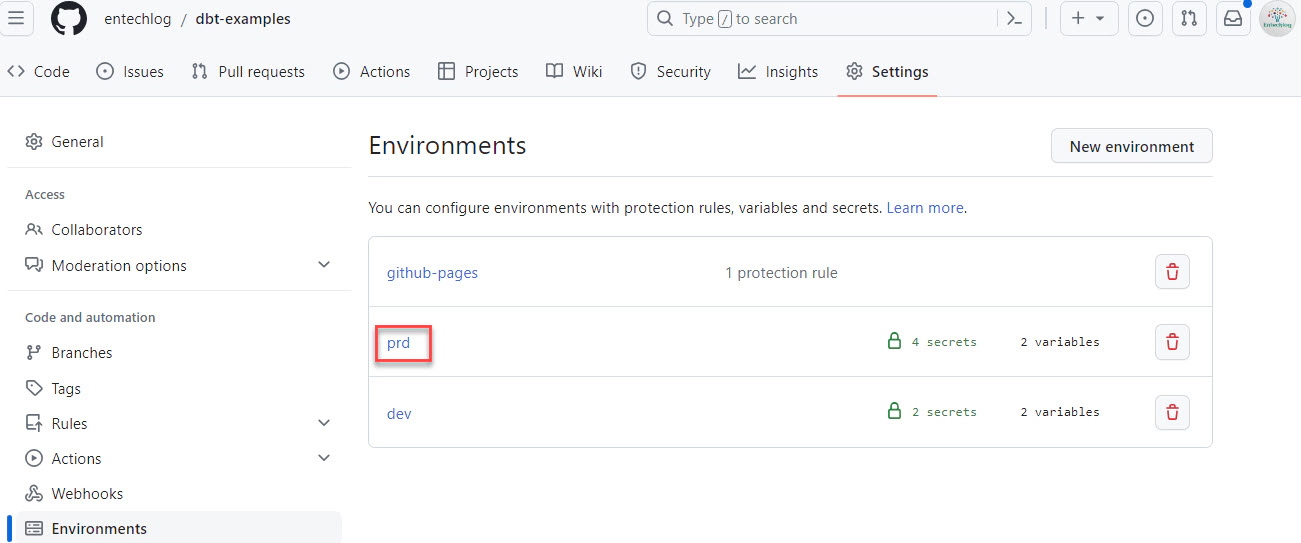
Next, navigate to the repository settings and go to “Environments” to add new environments such as ‘dev’, ‘stg’, ‘prd’ (or any other names that fit your standards). However, we will set up the GitHub actions for deployment in the “prd” environment only.
To generate and serve dbt docs locally, follow these simple steps:
Open your terminal or command prompt and run the following command to test the connection to the target database. If you are using the code from this demo repo, make sure to set the environment variables SNOWSQL_ACCOUNT, SNOWSQL_PWD, ENV_CODE, and PROJ_CODE.
dbt debug
Create the necessary documentation files based on your dbt project by running the following command:
dbt docs generate
After generating the documentation, use the following command to serve it locally:
dbt docs serve
By default, the documentation will be served on port 8080. However, if you want to specify a custom port, you can use the following command:
dbt docs serve --port 3000
This will serve the documentation on port 3000 (you can replace “3000” with any port of your choice).
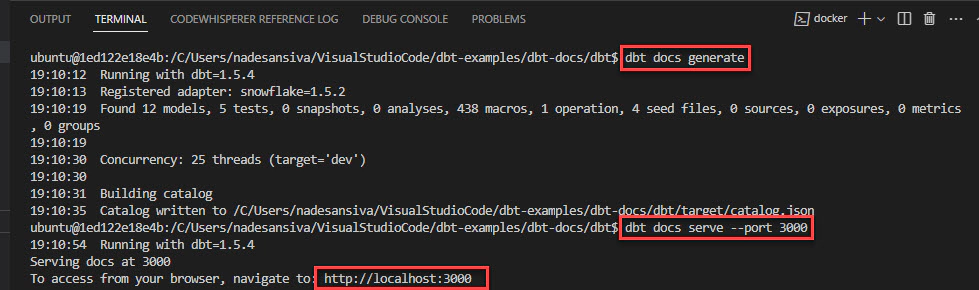
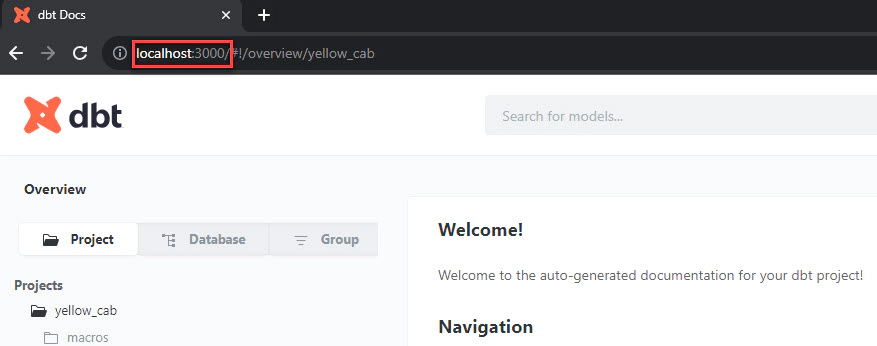
Navigate to localhost:3000 to verify the documents locally.
While local hosting does not enable serving the documentation to other users, it plays a crucial role in the validation process before publishing it publicly. By hosting the dbt documentation locally, you can review and verify the content’s accuracy, layout, and formatting.
GitHub Pages is a service that allows you to host a static website directly from a GitHub repository. It offers a straightforward and simple hosting solution, making it an excellent choice for ease of setup. However, keep in mind that the free tier of GitHub Pages only allows public access to the site. For private access and authentication setup, you’ll need to consider the enterprise tier.
To host your dbt docs in GitHub Pages, follow these steps:
Add the necessary environment secrets and environment variables related to your dbt project in the “prd” environment of your GitHub repository. If you are using the demo dbt project from this blog, include SNOWSQL_ACCOUNT and SNOWSQL_PWD as environment secrets, and ENV_CODE and PROJ_CODE as environment variables.
Create a new GitHub workflow to generate and deploy the dbt docs. Workflows are defined inside the .github/workflows directory. You can set when to trigger the workflow based on your use case, but it’s a good idea to trigger the workflow on push to the main branch.
If your organization has a Docker image with dbt pre-installed, you can optimize the workflow by removing steps related to dbt installation. This approach saves runtime and simplifies the workflow process.
name: "dbt prd pipeline"

# Triggers
on:
  # Triggers the workflow on push to main branch
  push:
	branches:
	  - main
  # Triggers the workflow manually from GUI
  workflow_dispatch:

jobs:
  # Build job
  build:
	runs-on: ubuntu-latest
	environment: prd
	env:
	  ENV_CODE: ${{vars.ENV_CODE}}
	  PROJ_CODE: ${{vars.PROJ_CODE}}
	  SNOWSQL_ACCOUNT: ${{ secrets.SNOWSQL_ACCOUNT }}
	  SNOWSQL_PWD: ${{ secrets.SNOWSQL_PWD }}

	steps:
	  - name: "Step 01 - Checkout current branch"
		id: step-01
		uses: actions/checkout@v3

	  - name: "Step 02 - Install dbt"
		id: step-02
		run: pip3 install dbt-core dbt-snowflake

	  - name: "Step 03 - Verify dbt"
		id: step-03
		run: dbt --version

	  - name: "Step 04 - Compile dbt"
		id: step-04
		working-directory: ./dbt-docs/dbt
		run: |
		  ls -ltra
		  export DBT_PROFILES_DIR=$PWD
		  dbt deps
		  dbt debug -t $ENV_CODE
		  dbt compile -t $ENV_CODE

	  - name: "Step 05 - Generate dbt docs"
		id: step-05
		working-directory: ./dbt-docs/dbt
		run: |
		  export DBT_PROFILES_DIR=$PWD
		  dbt deps
		  dbt docs generate -t $ENV_CODE
		  cd target
		  mkdir ${{ github.workspace }}/docs
		  cp *.json *.html graph.gpickle ${{ github.workspace }}/docs
		  ls -ltra ${{ github.workspace }}/docs

	  - name: "Step 06 - Upload pages to artifact"
		id: step-06
		uses: actions/upload-pages-artifact@v2
		with:
		  path: ${{ github.workspace }}/docs

	  - name: "Step 07 - Zip artifact"
		id: step-07
		run: zip -jrq docs.zip ${{ github.workspace }}/docs

	  - name: "Step 08 - Upload artifact for deployment job"
		id: step-08
		uses: actions/upload-artifact@v3
		with:
		  name: docs
		  path: docs.zip

  # Deploy to Github pages
  deploy-to-github-pages:
	# Add a dependency to the build job
	needs: build

	# Grant GITHUB_TOKEN the permissions required to make a Pages deployment
	permissions:
	  pages: write # to deploy to Pages
	  id-token: write # to verify the deployment originates from an appropriate source

	# Deploy to the github-pages environment
	environment:
	  name: github-pages
	  url: ${{ steps.deployment.outputs.page_url }}

	# Specify runner + deployment step
	runs-on: ubuntu-latest
	steps:
	  - name: Deploy to GitHub Pages
		id: deployment
		uses: actions/deploy-pages@v2 # or the latest "vX.X.X" version tag for this action
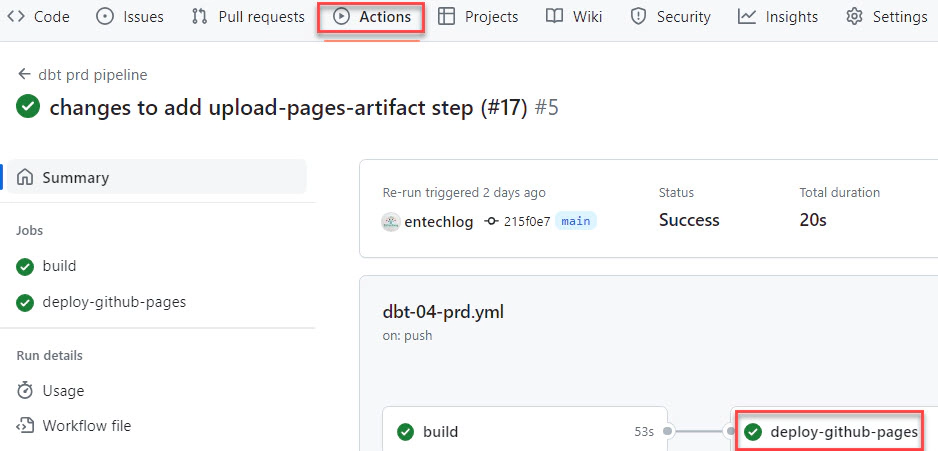
The workflow consists of two jobs. The first job generates the dbt docs and uploads the pages to an artifact. The second job deploys the pages to GitHub Pages, providing you with the URL to access your hosted dbt documentation. Thanks to this setup, the workflow will automatically trigger with every pull request to the main branch. To check the deployment status, go to the ‘Actions’ tab of your GitHub repo.
By following these steps, you can effectively host your dbt documentation on GitHub Pages, providing an accessible and publicly available way to share your dbt project documentation with others. Additionally, GitHub enterprise users can enhance security by limiting access to the documents, ensuring that sensitive information is only accessible to authorized users.
Netlify is a powerful serverless platform with an intuitive git-based workflow, serving as a versatile alternative to GitHub Pages. As an excellent choice for hosting static websites, including dbt documentation, Netlify offers additional features and seamless integration with various third-party services, making it a popular option among developers.
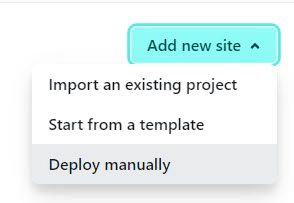
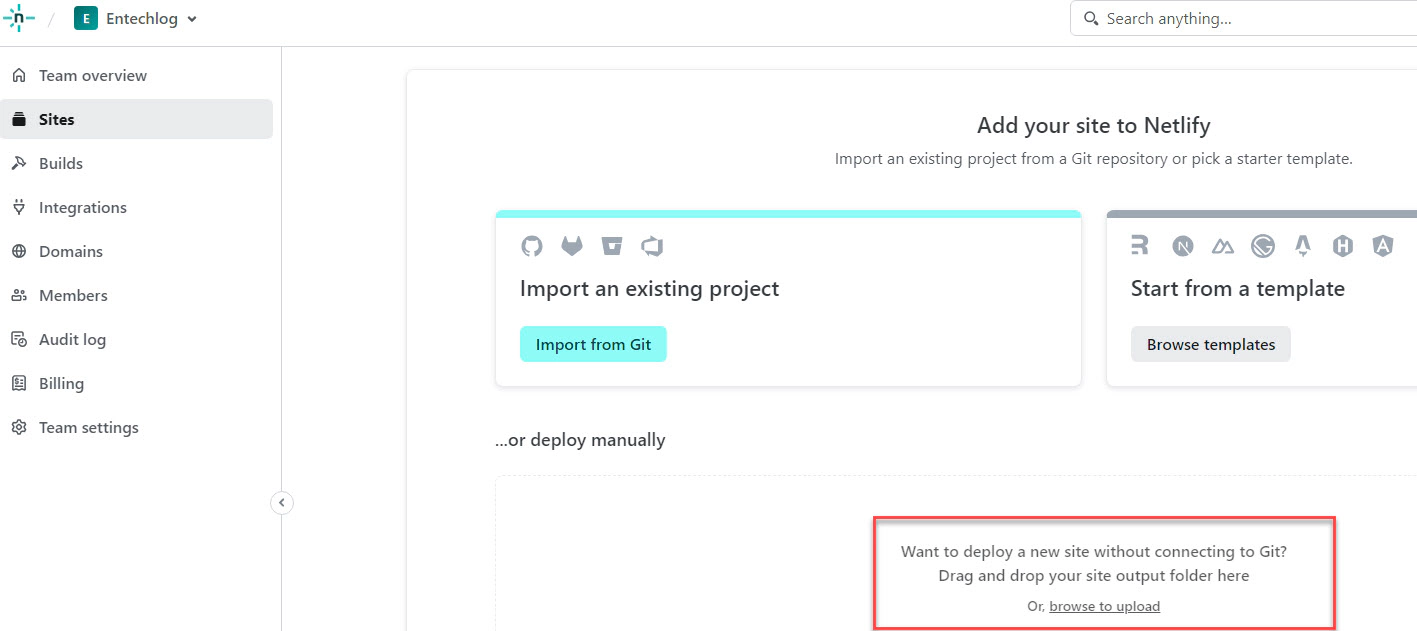
To get started, log in to Netlify and create a new site by selecting the “Drag and drop your site output folder here Or, browse to upload” option.
Upload an empty index.html file. You can use the site.zip file as a reference.
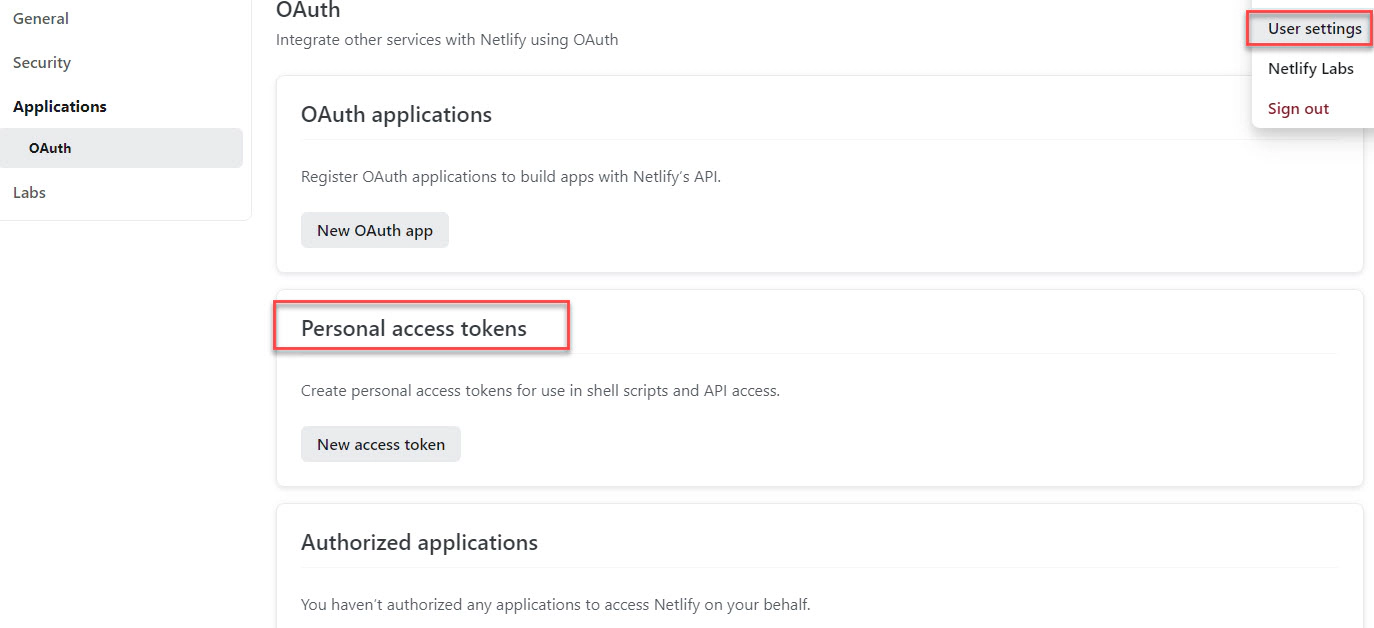
Navigate to “User settings” → “Personal access tokens” to create a new token. This token will be used to set the GitHub environment secrets NETLIFY_AUTH_TOKEN.
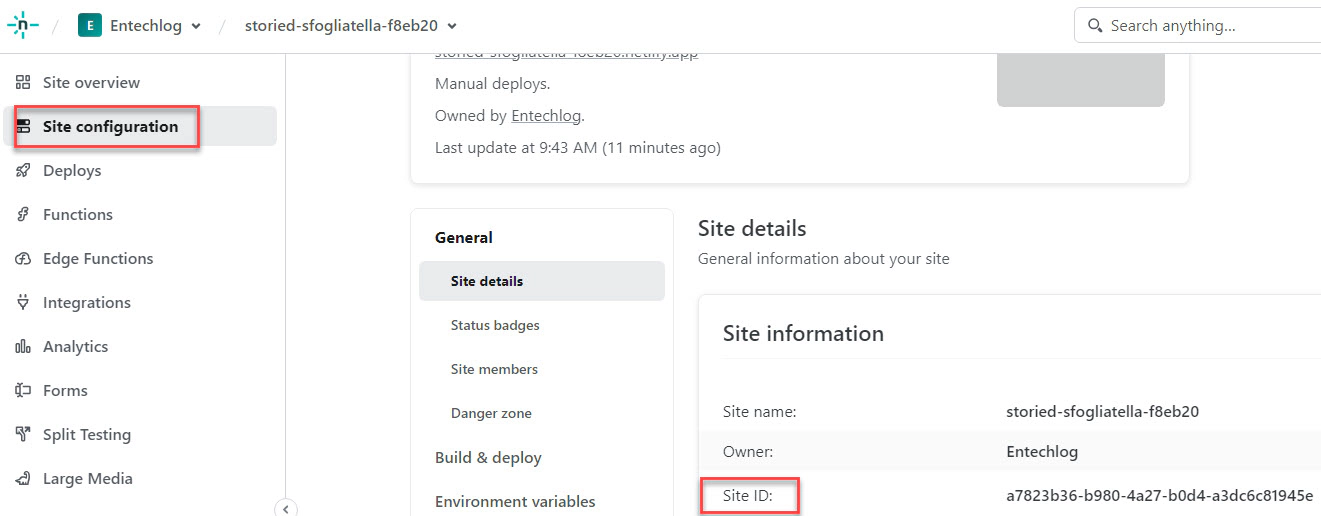
Navigate to “Site configuration” of the empty site which we just created and copy the “Site ID”. This will be used to set the NETLIFY_SITE_ID GitHub environment secret.
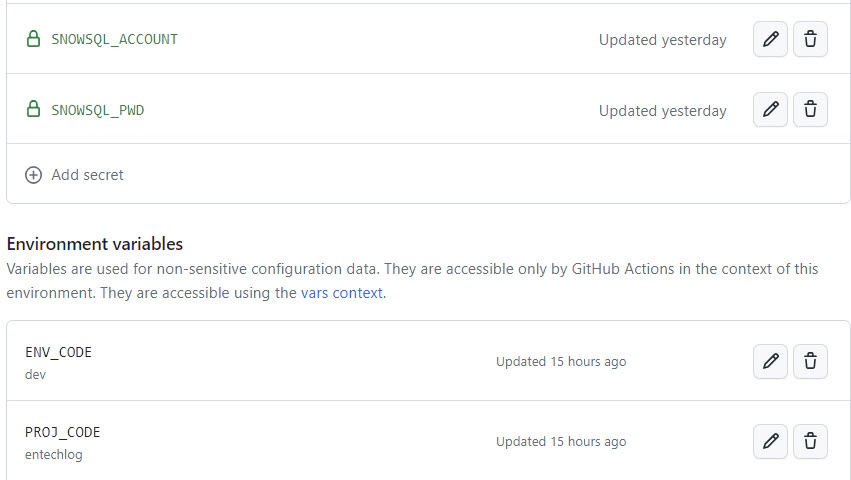
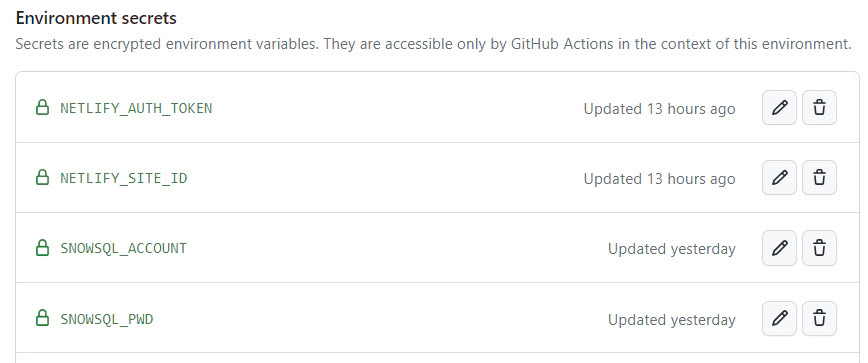
Add the necessary environment secrets and environment variables related to your dbt project in the prd environment of your GitHub repository. If you are using the demo dbt project from this blog, include SNOWSQL_ACCOUNT, SNOWSQL_PWD, NETLIFY_AUTH_TOKEN, and NETLIFY_SITE_ID as environment secrets, and ENV_CODE and PROJ_CODE as environment variables.
Here is how the GitHub environment secrets will look like after adding
Create a new GitHub workflow to generate and deploy the dbt docs. Workflows are defined inside the .github/workflows directory. You can set when to trigger the workflow based on your use case, but it’s a good idea to trigger the workflow on push to the main branch.
name: "dbt prd pipeline"

# Triggers
on:
# Triggers the workflow on push to main branch
push:
	branches:
	- main
# Triggers the workflow manually from GUI
workflow_dispatch:

jobs:
# Build job
build:
	runs-on: ubuntu-latest
	environment: prd
	env:
	ENV_CODE: ${{vars.ENV_CODE}}
	PROJ_CODE: ${{vars.PROJ_CODE}}
	SNOWSQL_ACCOUNT: ${{ secrets.SNOWSQL_ACCOUNT }}
	SNOWSQL_PWD: ${{ secrets.SNOWSQL_PWD }}

	steps:
	- name: "Step 01 - Checkout current branch"
		id: step-01
		uses: actions/checkout@v3

	- name: "Step 02 - Install dbt"
		id: step-02
		run: pip3 install dbt-core dbt-snowflake

	- name: "Step 03 - Verify dbt"
		id: step-03
		run: dbt --version

	- name: "Step 04 - Compile dbt"
		id: step-04
		working-directory: ./dbt-docs/dbt
		run: |
		ls -ltra
		export DBT_PROFILES_DIR=$PWD
		dbt deps
		dbt debug -t $ENV_CODE
		dbt compile -t $ENV_CODE

	- name: "Step 05 - Generate dbt docs"
		id: step-05
		working-directory: ./dbt-docs/dbt
		run: |
		export DBT_PROFILES_DIR=$PWD
		dbt deps
		dbt docs generate -t $ENV_CODE
		cd target
		mkdir ${{ github.workspace }}/docs
		cp *.json *.html graph.gpickle ${{ github.workspace }}/docs
		ls -ltra ${{ github.workspace }}/docs

	- name: "Step 06 - Upload pages to artifact"
		id: step-06
		uses: actions/upload-pages-artifact@v2
		with:
		path: ${{ github.workspace }}/docs

	- name: "Step 07 - Zip artifact"
		id: step-07
		run: zip -jrq docs.zip ${{ github.workspace }}/docs

	- name: "Step 08 - Upload artifact for deployment job"
		id: step-08
		uses: actions/upload-artifact@v3
		with:
		name: docs
		path: docs.zip

# Deploy to Netlify
deploy-to-netlify:
	# Add a dependency to the build job
	needs: build
	runs-on: ubuntu-latest
	environment: prd

	steps:
	- name: "Step 01 - Download artifact"
		id: step-01
		uses: actions/download-artifact@v3
		with:
		name: docs
		path: ${{ github.workspace }}

	- name: "Step 02 - Unzip artifact"
		id: step-02
		run: unzip ${{ github.workspace }}/docs.zip -d docs

	- name: "Step 03 - Deploy to Netlify"
		id: step-03
		uses: nwtgck/actions-netlify@v2.0
		with:
		publish-dir: ${{ github.workspace }}/docs
		production-branch: main
		github-token: ${{ secrets.GITHUB_TOKEN }}
		deploy-message: "Deploy from GitHub Actions"
		enable-pull-request-comment: true
		enable-commit-comment: false
		overwrites-pull-request-comment: true
		env:
		NETLIFY_AUTH_TOKEN: ${{ secrets.NETLIFY_AUTH_TOKEN }}
		NETLIFY_SITE_ID: ${{ secrets.NETLIFY_SITE_ID }}
		timeout-minutes: 1
The workflow comprises of two jobs. The first job is responsible for creating dbt docs and uploading the pages to the GitHub artifact. The second job is in charge of deploying the pages to Netlify.
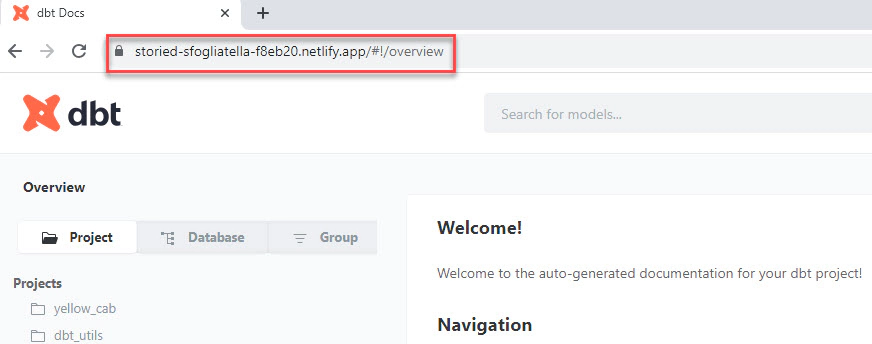
With every push to the main branch, the workflow will automatically run, deploying the latest dbt documents to Netlify. You can validate the job status by navigating to the “Actions” tab of your GitHub repo.
For a cost-effective and scalable solution, consider using Amazon S3 (Simple Storage Service) combined with CloudFront as a content delivery network. Amazon S3 provides reliable storage for your dbt documentation, while CloudFront ensures faster distribution of content to users worldwide. This setup also allows you to add basic authentication for restricted access to your dbt docs, providing an extra layer of security.
To begin, you can use a Docker container named developer-tools, which already includes AWS CLI and Terraform. If you’ve already set up a machine with AWS CLI and Terraform, feel free to skip this step and proceed to Create AWS Profile.
Login to your AWS cloud account and go to IAM –> Users to create a new user, such as terraform. This user will be utilized by Terraform to create the AWS resources.
Edit the permissions of the user and directly attach the AdministratorAccess policy to the user.
Please note that attaching AdministratorAccess is for the ease of this demo. In an ideal scenario, you should only attach the required permissions/policies to the Terraform user.
Navigate to the Security credentials section of the IAM user and create a new access key with CLI access only.
Clone the developer-tools repo from here using the following command:
git clone https://github.com/entechlog/developer-tools.git
Navigate into the developer-tools directory and create a copy of .env.template named .env. Then, add the values for AWS_ACCESS_KEY_ID, AWS_SECRET_ACCESS_KEY, and AWS_DEFAULT_REGION.
To start the container, use the following command:
docker-compose -f docker-compose-reg.yml up -d --build
To verify the status of your containers, run the following command:
docker ps
To SSH into the container, execute the following command:
docker exec -it developer-tools /bin/bash
Once inside the container, validate the Terraform version by running the following command. This ensures that Terraform is installed correctly:
terraform --version
Create an AWS profile named terraform by executing the following command:
aws configure --profile terraform
Update the account details with values from the development environment setup.
Test the profile by running the following command:
aws sts get-caller-identity
We will use Terraform to create the required AWS resources, specifically S3 and CloudFront for hosting dbt docs.
For the Terraform resource definition, you can refer to this link.
Clone the dbt-examples repo from here by running the command:
git clone https://github.com/entechlog/dbt-examples.git
Inside the developer-tools container, or from the machine with Terraform installed, navigate to dbt-docs/terraform/cloudfront-function.
Create a copy of terraform.tfvars.template as terraform.tfvars and update the values for the following variables:
| Variable Name | Description |
|---|---|
| aws_region | Primary region for all AWS resources |
| env_code | Environment code to identify the target environment |
| project_code | Project code used as a prefix when naming resources |
| app_code | Application code used as a prefix when naming resources |
| use_env_code_flag | Toggle on/off the env code in the resource names |
| enable_auth_flag | Toggle on/off the HTTP Basic Auth in CloudFront function |
| base64_user_pass | Base64 encoded username and password for HTTP Basic Auth |
Apply the Terraform template to create the resources.
# install custom modules
terraform init -upgrade

# format code
terraform fmt -recursive

# plan to review the summary of changes
terraform plan

# apply the changes to target environment
terraform apply
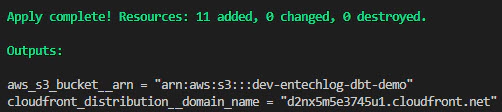
The terraform apply command will provide you with the S3 bucket name and CloudFront domain name. You can use this information in the production deployment pipeline or your job scheduler, such as Airflow, to copy the updated dbt docs with each run.
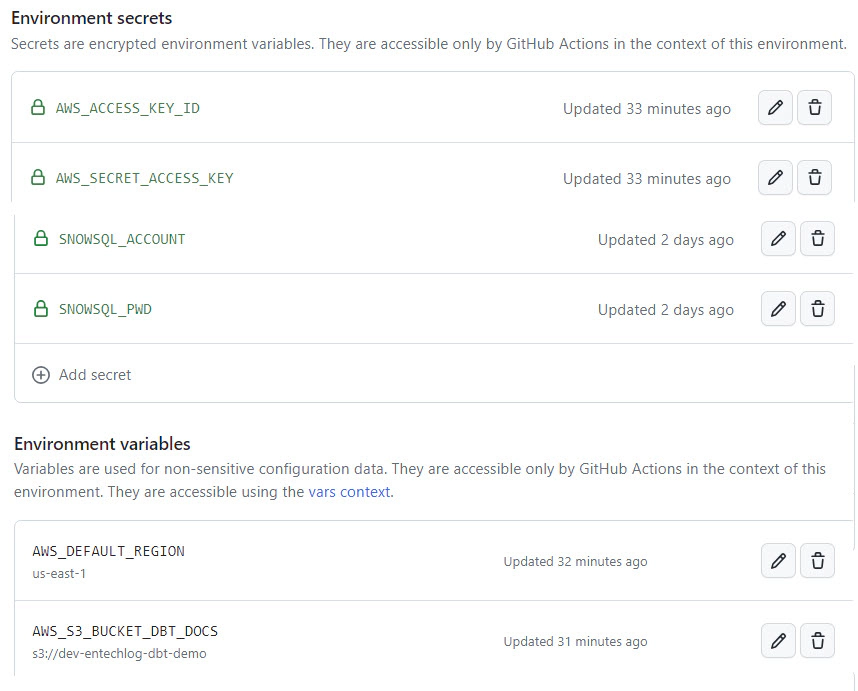
Add the necessary environment secrets and environment variables related to your dbt project in prd environment of Github repo. If you are using the dbt demo project from this blog, include SNOWSQL_ACCOUNT, SNOWSQL_PWD, AWS_ACCESS_KEY_ID, AWS_SECRET_ACCESS_KEY as environment secrets, and ENV_CODE, PROJ_CODE, AWS_DEFAULT_REGION, AWS_S3_BUCKET_DBT_DOCS as environment variables.
Create a new GitHub workflow to generate and deploy the dbt docs. Workflows are defined inside the .github/workflows directory. You can set when to trigger the workflow based on your use case, but it’s a good idea to trigger the workflow on push to the main branch. Here is an example of how to sync the docs to S3 after each dbt deployment using GitHub actions.
name: "dbt prd pipeline"

# Triggers
on:
# Triggers the workflow on push to main branch
push:
	branches:
	- main
# Triggers the workflow manually from GUI
workflow_dispatch:

jobs:
# Build job
build:
	runs-on: ubuntu-latest
	environment: prd
	env:
	ENV_CODE: ${{vars.ENV_CODE}}
	PROJ_CODE: ${{vars.PROJ_CODE}}
	SNOWSQL_ACCOUNT: ${{ secrets.SNOWSQL_ACCOUNT }}
	SNOWSQL_PWD: ${{ secrets.SNOWSQL_PWD }}

	steps:
	- name: "Step 01 - Checkout current branch"
		id: step-01
		uses: actions/checkout@v3

	- name: "Step 02 - Install dbt"
		id: step-02
		run: pip3 install dbt-core dbt-snowflake

	- name: "Step 03 - Verify dbt"
		id: step-03
		run: dbt --version

	- name: "Step 04 - Compile dbt"
		id: step-04
		working-directory: ./dbt-docs/dbt
		run: |
		ls -ltra
		export DBT_PROFILES_DIR=$PWD
		dbt deps
		dbt debug -t $ENV_CODE
		dbt compile -t $ENV_CODE

	- name: "Step 05 - Generate dbt docs"
		id: step-05
		working-directory: ./dbt-docs/dbt
		run: |
		export DBT_PROFILES_DIR=$PWD
		dbt deps
		dbt docs generate -t $ENV_CODE
		cd target
		mkdir ${{ github.workspace }}/docs
		cp *.json *.html graph.gpickle ${{ github.workspace }}/docs
		ls -ltra ${{ github.workspace }}/docs

	- name: "Step 06 - Upload pages to artifact"
		id: step-06
		uses: actions/upload-pages-artifact@v2
		with:
		path: ${{ github.workspace }}/docs

	- name: "Step 07 - Zip artifact"
		id: step-07
		run: zip -jrq docs.zip ${{ github.workspace }}/docs

	- name: "Step 08 - Upload artifact for deployment job"
		id: step-08
		uses: actions/upload-artifact@v3
		with:
		name: docs
		path: docs.zip

# Deploy to S3
deploy-to-s3:
	# Add a dependency to the build job
	needs: build
	runs-on: ubuntu-latest
	environment: prd

	steps:
	- name: "Step 01 - Download artifact"
		id: step-01
		uses: actions/download-artifact@v3
		with:
		name: docs
		path: ${{ github.workspace }}

	- name: "Step 02 - Unzip artifact"
		id: step-02
		run: unzip ${{ github.workspace }}/docs.zip -d docs

	- name: "Step 03 - Setup AWS CLI"
		id: step-03
		uses: aws-actions/configure-aws-credentials@v2
		with:
		aws-access-key-id: ${{ secrets.AWS_ACCESS_KEY_ID }}
		aws-secret-access-key: ${{ secrets.AWS_SECRET_ACCESS_KEY }}
		aws-region: ${{ vars.AWS_DEFAULT_REGION }}

	- name: "Step 04 - Sync files to S3 bucket"
		run: |
		aws s3 sync ${{ github.workspace }}/docs ${{ vars.AWS_S3_BUCKET_DBT_DOCS }} --delete
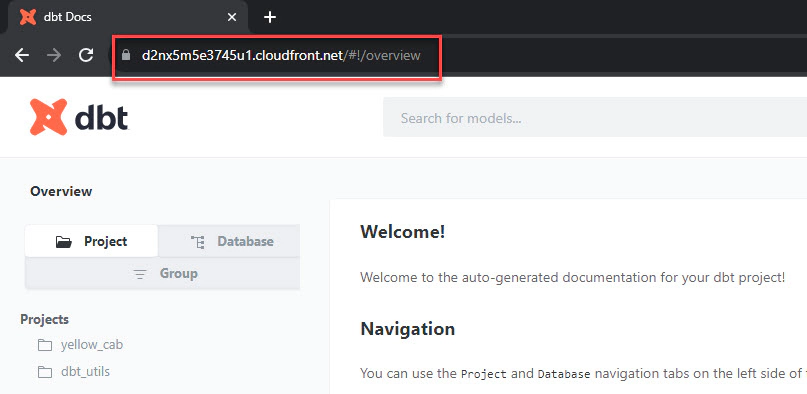
After deploying the dbt docs to CloudFront, you can easily view them by navigating to the CloudFront URL. Additionally, remember that you have the option to enable or disable basic authentication based on the enable_auth_flag.
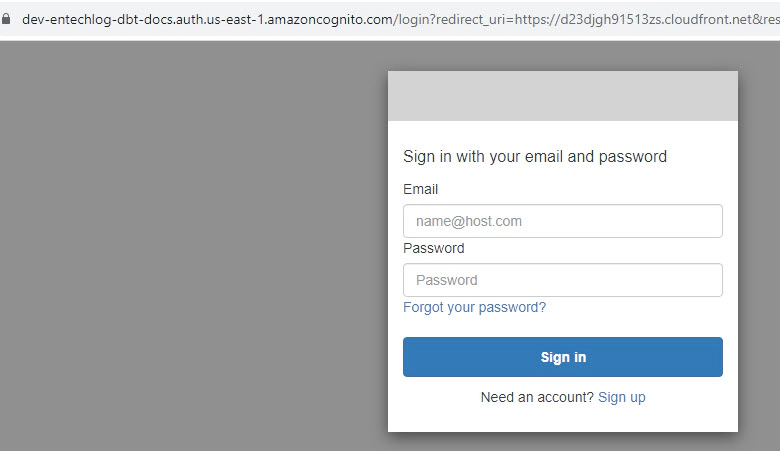
The most robust option available is to use Amazon S3, CloudFront, and Cognito together. With this setup, you can provide users with sign-up options, enhancing access control. Amazon Cognito manages user identities and authentication, allowing you to define user pools and sign-up/sign-in processes. This approach gives you the flexibility to connect to existing identity pools like Google or create a new identity pool specific to your application. Additionally, this setup includes logic to limit sign-ups from specific domains using a pre-signup Lambda validation.
We will use Terraform to create the required AWS resources for hosting dbt docs. The necessary resources include S3, CloudFront, Cognito, IAM roles, and Lambda functions.
To setup Terraform, follow the steps from development environment setup to create AWS Profile.
See here for the Terraform resource definition.
Clone the dbt-examples repo from here by running the following command. You can skip this step if you already have the cloned repo from previous steps.
git clone https://github.com/entechlog/dbt-examples.git
Inside the developer-tools container OR from the machine which has Terraform installed, navigate into dbt-docs/terraform/cognito-cloudfront-s3.
Create a copy of terraform.tfvars.template as terraform.tfvars and update the values for the following variables:
| Variable Name | Description |
|---|---|
| aws_region | Primary region for all AWS resources |
| env_code | Environment code to identify the target environment |
| project_code | Project code used as a prefix when naming resources |
| app_code | Application code used as a prefix when naming resources |
| use_env_code_flag | Toggle on/off the env code in the resource names |
| aws_cloudfront_distribution__domain_name | Cloudfront distribution domain_name is not required to be set in the initial run. The domain_name is generated by AWS once the CloudFront distribution is created. |
Create the required AWS resources by applying the Terraform template.
# install custom modules
terraform init -upgrade

# format code
terraform fmt -recursive

# plan to review the summary of changes
terraform plan

# apply the changes to target environment
terraform apply
To successfully set up the Cognito distribution, you will need to run the Terraform apply twice. The first run will create the CloudFront distribution, and after its completion, you should update the aws_cloudfront_distribution__domain_name variable in terraform.tfvars with the output from the first run. Then, you can run the Terraform apply again to ensure the configuration is complete. This is required to avoid a cycle dependency in creating resources.
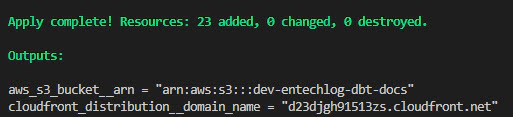
After running terraform apply, you will receive the S3 bucket name and CloudFront domain name as output. This information can be utilized in your production deployment pipeline or job scheduler, such as airflow, to copy the updated dbt docs for further distribution.
To automate the document deployment during each code deploy, you need to add the following environment secrets and variables in the prd environment of your GitHub repository. If you are using the dbt demo project from this blog, include SNOWSQL_ACCOUNT, SNOWSQL_PWD, AWS_ACCESS_KEY_ID, AWS_SECRET_ACCESS_KEY as environment secrets, and ENV_CODE, PROJ_CODE, AWS_DEFAULT_REGION, AWS_S3_BUCKET_DBT_DOCS as environment variables.
Create a new GitHub workflow to generate and deploy the dbt docs. Workflows are defined inside the .github/workflows directory. You can set when to trigger the workflow based on your use case, but it’s a good idea to trigger the workflow on push to the main branch. Here is an example of how to sync the docs to S3 after each dbt deployment using GitHub actions.
name: "dbt prd pipeline"

# Triggers
on:
# Triggers the workflow on push to main branch
push:
	branches:
	- main
# Triggers the workflow manually from GUI
workflow_dispatch:

jobs:
# Build job
build:
	runs-on: ubuntu-latest
	environment: prd
	env:
	ENV_CODE: ${{vars.ENV_CODE}}
	PROJ_CODE: ${{vars.PROJ_CODE}}
	SNOWSQL_ACCOUNT: ${{ secrets.SNOWSQL_ACCOUNT }}
	SNOWSQL_PWD: ${{ secrets.SNOWSQL_PWD }}

	steps:
	- name: "Step 01 - Checkout current branch"
		id: step-01
		uses: actions/checkout@v3

	- name: "Step 02 - Install dbt"
		id: step-02
		run: pip3 install dbt-core dbt-snowflake

	- name: "Step 03 - Verify dbt"
		id: step-03
		run: dbt --version

	- name: "Step 04 - Compile dbt"
		id: step-04
		working-directory: ./dbt-docs/dbt
		run: |
		ls -ltra
		export DBT_PROFILES_DIR=$PWD
		dbt deps
		dbt debug -t $ENV_CODE
		dbt compile -t $ENV_CODE

	- name: "Step 05 - Generate dbt docs"
		id: step-05
		working-directory: ./dbt-docs/dbt
		run: |
		export DBT_PROFILES_DIR=$PWD
		dbt deps
		dbt docs generate -t $ENV_CODE
		cd target
		mkdir ${{ github.workspace }}/docs
		cp *.json *.html graph.gpickle ${{ github.workspace }}/docs
		ls -ltra ${{ github.workspace }}/docs

	- name: "Step 06 - Upload pages to artifact"
		id: step-06
		uses: actions/upload-pages-artifact@v2
		with:
		path: ${{ github.workspace }}/docs

	- name: "Step 07 - Zip artifact"
		id: step-07
		run: zip -jrq docs.zip ${{ github.workspace }}/docs

	- name: "Step 08 - Upload artifact for deployment job"
		id: step-08
		uses: actions/upload-artifact@v3
		with:
		name: docs
		path: docs.zip

# Deploy to S3
deploy-to-s3:
	# Add a dependency to the build job
	needs: build
	runs-on: ubuntu-latest
	environment: prd

	steps:
	- name: "Step 01 - Download artifact"
		id: step-01
		uses: actions/download-artifact@v3
		with:
		name: docs
		path: ${{ github.workspace }}

	- name: "Step 02 - Unzip artifact"
		id: step-02
		run: unzip ${{ github.workspace }}/docs.zip -d docs

	- name: "Step 03 - Setup AWS CLI"
		id: step-03
		uses: aws-actions/configure-aws-credentials@v2
		with:
		aws-access-key-id: ${{ secrets.AWS_ACCESS_KEY_ID }}
		aws-secret-access-key: ${{ secrets.AWS_SECRET_ACCESS_KEY }}
		aws-region: ${{ vars.AWS_DEFAULT_REGION }}

	- name: "Step 04 - Sync files to S3 bucket"
		run: |
		aws s3 sync ${{ github.workspace }}/docs ${{ vars.AWS_S3_BUCKET_DBT_DOCS }} --delete
Finally, navigate to the CloudFront URL to view the dbt docs. Users can now sign up and access the dbt documentation based on the settings you provided in the Cognito User Pool.
Hosting dbt documentation is essential for effective collaboration and knowledge sharing among data teams. We explored multiple hosting options, from simple GitHub Pages to robust setups using Amazon S3, CloudFront, and Cognito. Each option has its advantages and is suitable for different scenarios.
Based on your project’s needs and security requirements, you can choose the best hosting option that aligns with your organization’s goals. Implementing any of these hosting methods will ensure your dbt documentation is readily available to your team, leading to improved productivity and data-driven decision making. Happy dbt documenting!
Hope this was helpful. Did I miss something ? Let me know in the comments.
This blog represents my own viewpoints and not those of my employer, Snowflake. All product names, logos, and brands are the property of their respective owners.
Unleash the Power of Chatting with Data: A Deep Dive into Snowflake, ChatGPT, dbt, and Streamlit In the era of …
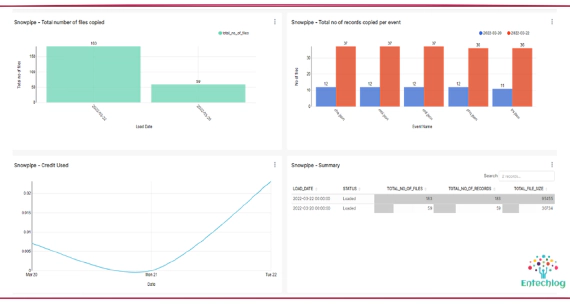
Snowpipe is Snowflake’s continuous data ingestion service. Snowpipe loads data within minutes after files are …