How to setup dbt for Materialize database with streaming data from Redpanda
Materialize is a streaming database for real-time applications. Materialize accepts input data from a variety of …

I have been using self-hosted services for a while now. It all started with Pogoplug, the cost effective plug and play device. I still have more than a few of them lying around my house even though they are long gone as a product. After Pogoplug, I moved to Plex for managing my music, videos and photos. Plex worked great for media streaming but Plex Photos was slow. This is when I started exploring alternatives and found Immich.
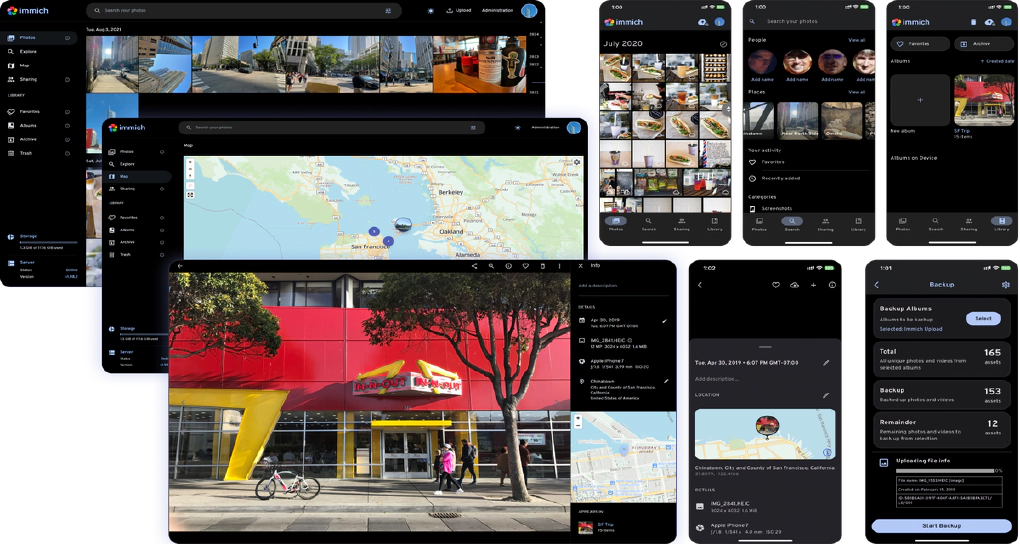
Immich is a self-hosted photo and video management solution. Think of it like Google Photos but running on your own hardware. It has mobile apps for iOS and Android, facial recognition, object detection, map and timeline views, and support for mounting existing photo folders as read-only external libraries.
In this article, we will see how to set up Immich on a Windows machine using Docker, work with external photo libraries, automate album creation, and enable remote access.
All the code and configuration files used in this setup are available here: entechlog/homelab-examples/immich
Before getting started, make sure you have the following:
My hard disks are attached to a Windows machine, so this guide is specifically focused on getting Immich to work with Windows and Docker Desktop. If you are on Linux, the official Immich documentation covers that setup well.
If you don’t already have Docker Desktop installed on your Windows machine, follow these steps:
Download Docker Desktop from the official website
Run the installer and follow the on-screen instructions
Ensure WSL 2 backend is enabled during installation (recommended by Docker)
After installation, start Docker Desktop and verify it’s running by opening a terminal and running:
docker --version
docker compose version
You should see version information for both Docker and Docker Compose
Make sure Docker Desktop is set to start automatically with Windows if you want Immich to be always available. You can configure this under Docker Desktop Settings > General > Start Docker Desktop when you sign in to your computer.
There is one thing Windows users need to change. As noted in the Immich requirements documentation, update the .env file with:
DB_DATA_LOCATION=pgdata
This uses a Docker named volume instead of a bind mount for the PostgreSQL data which avoids file permission issues on Windows. Also make sure the pgdata named volume is declared at the bottom of your docker-compose.yml:
volumes:
  model-cache:
  pgdata:
The docker-compose in the entechlog/homelab-examples repository already has both of these configured, so if you are using that as your starting point you are all set.
Let’s get Immich up and running.
Clone the Repository
git clone https://github.com/entechlog/homelab-examples.git
cd homelab-examples/immich/windows
Create the Environment File
Create a copy of the environment template:
cp .env.template .env
Open the .env file and update the following values:
# Path to your external photo library on the host machine
# Windows example: F:/Photos
EXTERNAL_LIB_LOCATION=F:/Photos

# Connection secret for postgres - CHANGE THIS to a random password
# Use only characters A-Za-z0-9, no special characters or spaces
DB_PASSWORD=your-secure-password-here
For EXTERNAL_LIB_LOCATION, use the forward slash / in the path even on Windows (e.g., F:/Photos instead of F:\Photos). This is because Docker uses Linux-style paths internally.
Launch the Services
Start all the containers:
docker compose up -d
Give it a minute or two for all services to come up, then open http://localhost:2283 in your browser
Initial Setup
On your first visit, Immich will guide you through the initial setup:
Add External Library
Since my photos are stored on external hard disks attached to my Windows machine, I set up Immich to mount this as a read-only external library. In the docker-compose, the external library is mounted as:
volumes:
  - ${EXTERNAL_LIB_LOCATION}:/photos:ro
The :ro flag makes the mount read-only, so Immich can read and index your photos but cannot modify or delete the originals.
After logging in, configure the external library:
/photos (this maps to your EXTERNAL_LIB_LOCATION)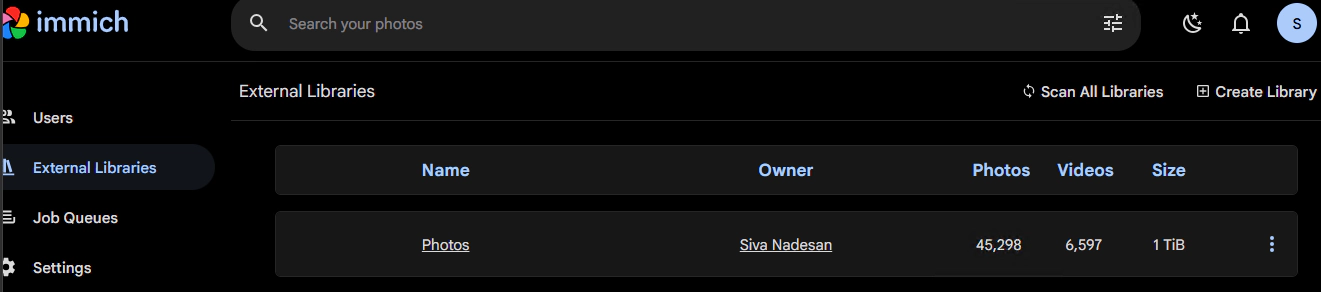
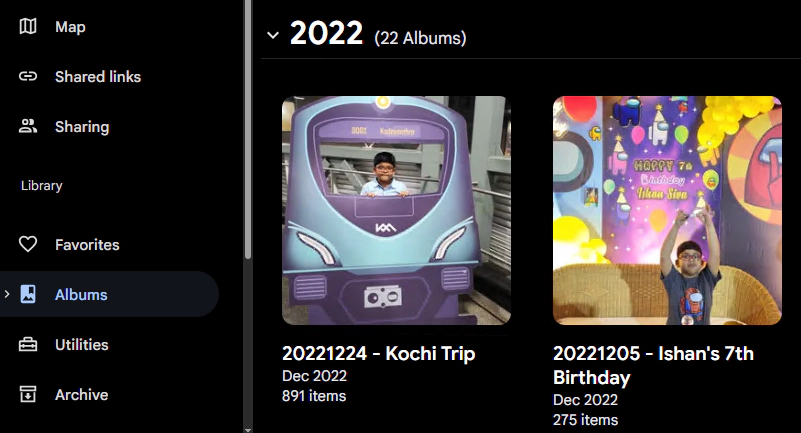
At this point we have Immich up and running with the external photo library. Next, let’s look at a few things to improve the experience.
One of the challenges with external libraries in Immich is that it doesn’t natively create albums based on folder structure. If your photos are organized in folders like Vacation 2024, Birthday Party, etc., you would need to manually create albums in Immich,which isn’t practical for large libraries.
To solve this, the setup uses immich-folder-album-creator, which runs as a Docker container alongside Immich. It automatically scans your external library and creates albums based on the folder names.
Before the album creator can work, you need to generate an API key and update the .env file:
.env file:# Immich API key for the user that owns the external library
# Generate at: Immich Web UI -> Account Settings -> API Keys
IMMICH_FOLDER_ALBUM_CREATOR_API_KEY=your-api-key-here
# Root paths inside the container for the external library
IMMICH_FOLDER_ALBUM_CREATOR_ROOT_PATH=/photos
# Number of folder levels to use for album name
# 1 = just folder name (e.g., "Vacation 2024")
# 2 = two levels (e.g., "Person Vacation 2024")
IMMICH_FOLDER_ALBUM_CREATOR_ALBUM_LEVELS=1
# Cron schedule for album sync (default: hourly)
IMMICH_FOLDER_ALBUM_CREATOR_CRON=0 * * * *
# Run album creator immediately on container start
IMMICH_FOLDER_ALBUM_CREATOR_RUN_IMMEDIATELY=true
docker compose up -d --force-recreate immich-folder-album-creator
You can check the album creator logs to verify it’s working:
docker logs immich_folder_album_creator --tail 50
As I used Immich with a large external library, I ran into a few challenges that aren’t addressed out of the box. To handle these, I created a set of maintenance scripts that run as a Docker service called immich-scripts. All scripts run in dry-run mode by default, making them safe to test before making any changes.
docker compose run --rm immich-scripts help
Clean Albums (Orphan Album Removal)
When you rename or delete a folder in your external library, the album that was created from that folder becomes orphaned,it still exists in Immich but no longer has a corresponding folder. Over time, this leads to stale albums cluttering your library.
The clean-albums script scans your external library folders, compares them with existing Immich albums, and identifies albums that no longer have a matching folder.
# Preview what would be cleaned (dry-run mode)
docker compose run --rm immich-scripts clean-albums

# Show detailed folder and album information
docker compose run --rm immich-scripts clean-albums --show-folders --show-albums

# Actually delete orphan albums
docker compose run --rm immich-scripts clean-albums --delete
Find Duplicates (Metadata-Based)
Immich has a built-in duplicate detection feature, but it works based on image similarity. This means if you took multiple shots of the same subject, Immich may flag them as duplicates even though they are different photos.
To find actual duplicates,files with the same filename and file size,I created the find-duplicates script. This uses file metadata instead of image similarity for more accurate duplicate detection.
# Preview duplicates (dry-run mode)
docker compose run --rm immich-scripts find-duplicates

# Filter by minimum file size
docker compose run --rm immich-scripts find-duplicates --min-size 1MB

# Actually delete duplicates
docker compose run --rm immich-scripts find-duplicates --delete
Clean Trash (External Library Trash Management)
When you use external libraries, Immich tracks files by their path. If files are moved or renamed outside of Immich, those assets get marked as offline and end up in the trash. The issue is that the normal “Empty Trash” UI button in Immich doesn’t always handle external library assets properly.
The clean-trash script helps manage these trashed and offline assets:
# Preview trashed assets (dry-run mode)
docker compose run --rm immich-scripts clean-trash

# Only process assets trashed more than 7 days ago
docker compose run --rm immich-scripts clean-trash --min-days 7

# Clean trash for a specific path
docker compose run --rm immich-scripts clean-trash --path "/photos/OldFolder" --delete
Windows Git Bash users: When using Unix-style paths in commands, prefix them with MSYS_NO_PATHCONV=1 to prevent automatic path conversion. For example: MSYS_NO_PATHCONV=1 docker compose run --rm immich-scripts clean-trash --path "/photos/OldFolder"
With the steps above, Immich is up and running and accessible locally at http://localhost:2283. But what about accessing your photos when you’re away from home? There are a few options depending on your needs.
If you already have a VPN set up on your home network,something like PiVPN,you can simply use that to access Immich remotely. Connect to your home VPN and navigate to the local Immich URL. No additional configuration needed.
If you don’t have a VPN setup and mainly need to share photos with family members in the household, Tailscale is an excellent option. Tailscale creates a secure, private network between your devices without exposing any ports to the internet.
The setup uses a Tailscale Docker sidecar that gives Immich its own secure address on your Tailscale network with automatic HTTPS.
windows/docker-compose.ymlNavigate to the Tailscale directory and create your environment file:
cd homelab-examples/immich/tailscale
cp .env.template .env
Update the .env file with your Tailscale settings:
# Your Tailscale authentication key
TS_AUTHKEY=tskey-auth-xxxxxxxxxxxx

# IP address of your Immich machine on the local network
IMMICH_HOST=192.168.0.180
Start the Tailscale container:
docker compose up -d
Once running, Immich will be accessible at https://immich.<your-tailnet-name>.ts.net from any device on your Tailscale network.
https://immich.<your-tailnet-name>.ts.netThe Tailscale container must remain running for remote access. With restart: unless-stopped in the docker-compose, it launches automatically with Docker Desktop.
| Issue | Solution |
|---|---|
| Container not joining tailnet | Verify auth key validity, check logs with docker logs immich_tailscale |
| Duplicate node names (immich-2, etc.) | Remove old nodes from Machines section in Tailscale admin, then docker compose down -v && docker compose up -d |
Only use -v flag when resetting the node identity. Normal restarts should omit this flag to preserve state.
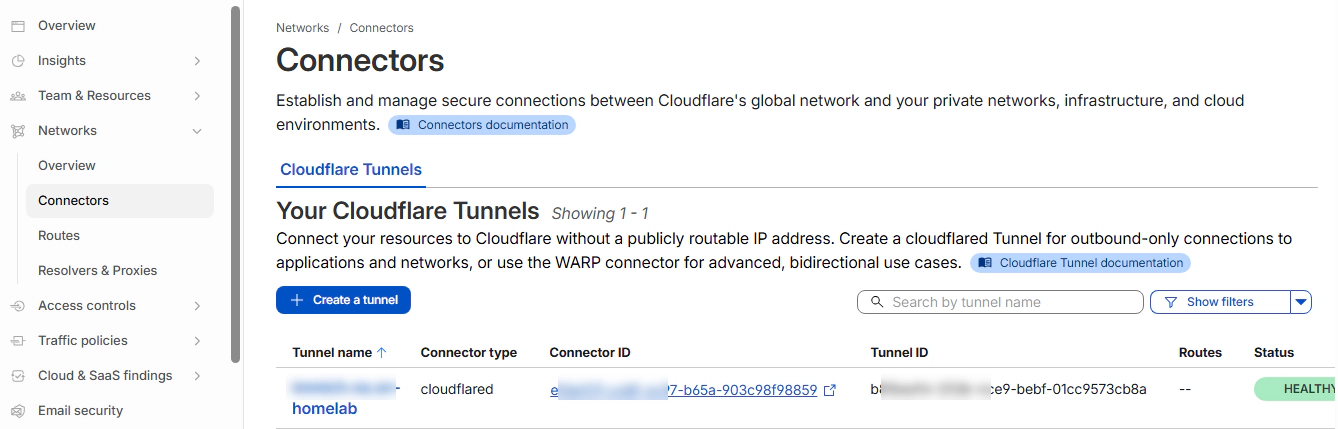
Tailscale works great for family access, but what if you want to share albums with people who are not part of your Tailscale network or Immich users? This is where having a custom domain with a Cloudflare Tunnel becomes useful.
Cloudflare Tunnel provides secure public access to your Immich instance without exposing any ports on your router. It comes with built-in DDoS protection and works with Cloudflare’s free tier.
Cloudflare free tier caps uploads at 100MB per request. This only affects uploading through the tunnel (e.g., large videos). Viewing and sharing albums is completely unaffected.
windows/docker-compose.yml| Setting | Value |
|---|---|
| Subdomain | photos (or your preferred name) |
| Domain | yourdomain.com |
| Service Type | HTTP |
| URL | 192.168.0.180:2283 |
Replace the URL with your Immich machine’s local IP and port.
Navigate to the Cloudflare directory and create your environment file:
cd homelab-examples/immich/cloudflare
cp .env.template .env
Update the .env file with your tunnel token:
TUNNEL_TOKEN=your-tunnel-token-here
Start the Cloudflare container:
docker compose up -d
Verify the connection by checking the logs:
docker logs immich_cloudflare
Look for a “Connection registered” message. Once confirmed, visit https://photos.yourdomain.com to access Immich.
Update Immich to use your custom domain for share links:
https://photos.yourdomain.comNow when you share albums or photos from Immich, the share links will use your public domain instead of the internal IP address.
| Issue | Solution |
|---|---|
| Tunnel not connecting | Verify token accuracy, check logs with docker logs immich_cloudflare |
| Share links show internal IP | Ensure External URL is set correctly in Immich admin settings |
| 502 Bad Gateway | Confirm Immich is running and reachable at the configured host:port |
With this setup, you have a fully self-hosted photo management solution that runs on your existing Windows machine with Docker, indexes your external photo library without modifying the original files, automatically creates albums based on your folder structure, and can be accessed remotely via VPN, Tailscale, or Cloudflare tunnel.
Immich is actively developed and the community is growing fast. It has replaced Plex Photos entirely for me and the experience has been significantly better,faster browsing, better search, proper facial recognition, and a mobile app that works.
Hope this was helpful. Did I miss something ? Let me know in the comments.
This blog represents my own viewpoints and not those of my employer. All product names, logos, and brands are the property of their respective owners.
Materialize is a streaming database for real-time applications. Materialize accepts input data from a variety of …
Materialize is a streaming database for real-time applications. Materialize accepts input data from a variety of …