Exploring ksqlDB in Docker, headless ksqlDB and ksqlDB in Kubernetes
ksqlDB is built on top of Kafka Streams, a lightweight, powerful Java library for enriching, transforming, and …

In this article, we will see how to use the Snowflake connector to stream data from Kafka to Snowflake. The Snowflake Connector for Kafka (“Kafka connector”) reads data from one or more Apache Kafka topics and loads the data into a Snowflake table. Code used in this article can be found at here. To have a stream of data for this demo, we will source data from twitter.
Before the connector can sink data to Snowflake, you need to generate a key pair. Snowflake authentication requires 2048-bit (minimum) RSA. You add the public key to a Snowflake user account. You add the private key to the connector configuration. Generate key pair in the machine from which we are going to execute the steps.
Generate a private key using OpenSSL
openssl genrsa -out snowflake_key.pem 2048
Generate the public key referencing the private key
openssl rsa -in snowflake_key.pem -pubout -out snowflake_key.pub
Get the required part of public key
grep -v "BEGIN PUBLIC" snowflake_key.pub | grep -v "END PUBLIC"|tr -d '\r\n'`
Get the required part of private key
grep -v "BEGIN RSA PRIVATE KEY" snowflake_key.pem | grep -v "END RSA PRIVATE KEY"|tr -d '\r\n'`
Login into your Snowflake account and execute the following queries to create a user account and add the public key to this account
Switch to the SECURITYADMIN role
USE ROLE SECURITYADMIN;
Create Kafka user in Snowflake
CREATE USER kafka RSA_PUBLIC_KEY='<your-public-key>';
Assign role for Kafka user
GRANT ROLE SYSADMIN TO USER kafka;
Download docker-compose.yml and all required components from here
Create a copy of kafka-to-snowflake\kafka-connect\secrets\connect-secrets.properties.template as kafka-to-snowflake\kafka-connect\secrets\connect-secrets.properties and update it with the Twitter API key details and Snowflake credentials
Start the services in docker. This will bring up the Kafka cluster and Kafka connectors automatically by running create-twitter-source.sh and create-snowflake-sink.sh
docker-compose up -d
Validate all services
docker ps
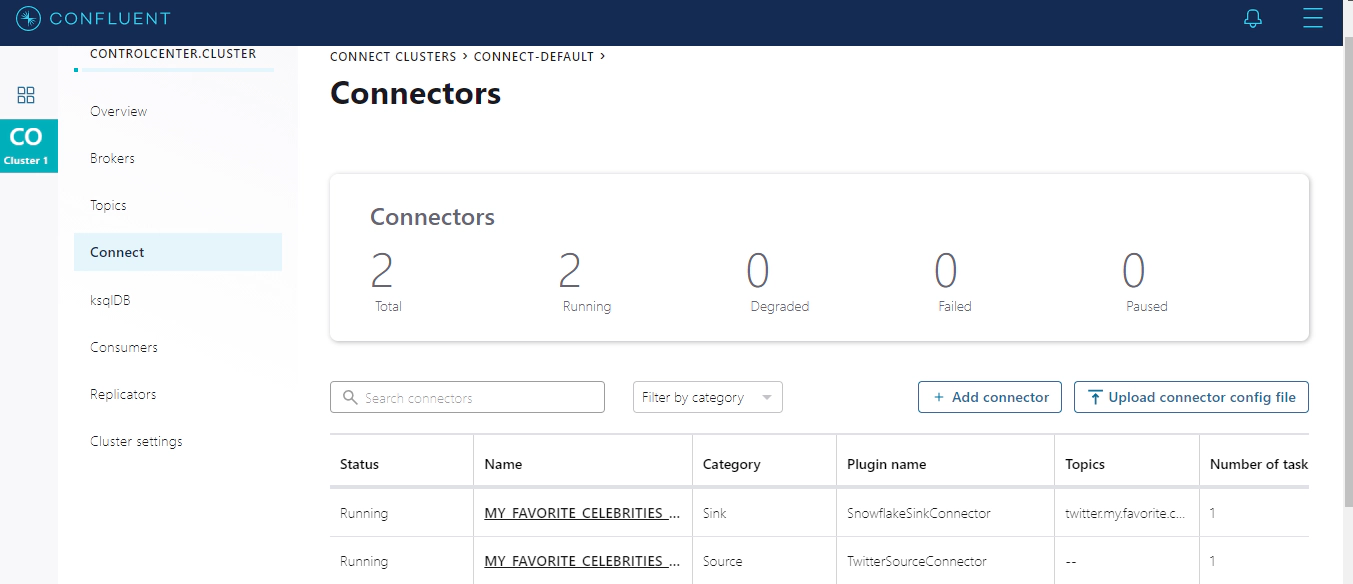
Navigate to Control Center in http://localhost:9021/clusters and check the status of connectors. We should have two connectors running, one to source data from Twitter and other to sink the data to Snowflake.
Navigate to Snowflake UI for your account. We should see the new table in DEMO_DB database, PUBLIC schema
Check few random records by running
SELECT *
FROM "DEMO_DB"."PUBLIC"."TWITTER_MY_FAVORITE_CELEBRITIES_SRC_1206524140"
LIMIT 10;
Check record count by running. The counts should change frequently if you rerun this query as we are streaming data.
SELECT CURRENT_TIMESTAMP()
	,COUNT(*)
FROM "DEMO_DB"."PUBLIC"."TWITTER_MY_FAVORITE_CELEBRITIES_SRC_1206524140";
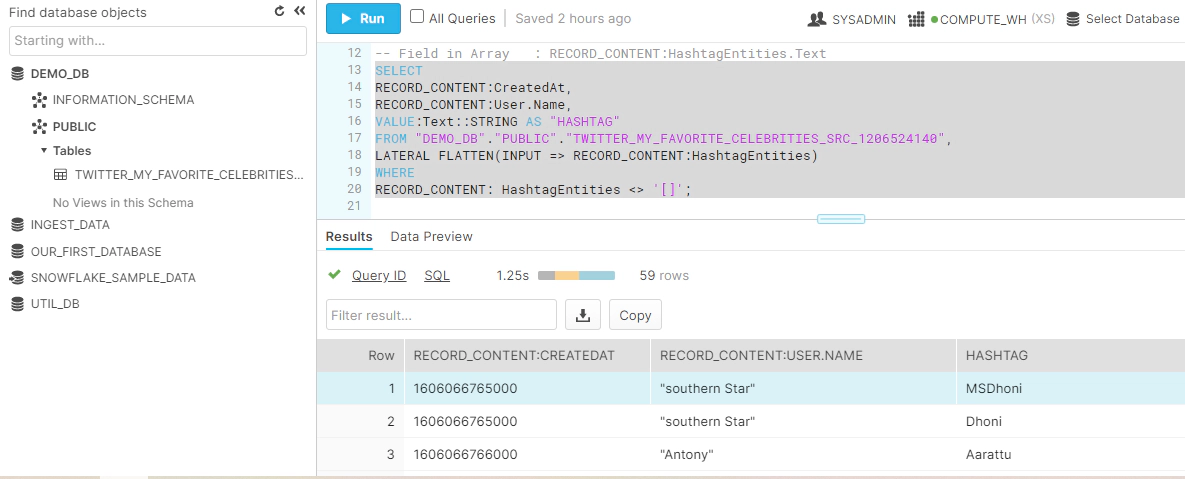
Parse the JSON documents in Snowflake, Here is an example to select few columns from the JSON document.
-- Parse JSON
-- Field in root    : RECORD_CONTENT:CreatedAt
-- Field in Dict    : RECORD_CONTENT:User.Name
-- Field in Array   : RECORD_CONTENT:HashtagEntities (VALUE:Text::STRING)
SELECT
RECORD_CONTENT:CreatedAt AS "CREATEDAT",
RECORD_CONTENT:User.Name AS "USERNAME",
VALUE:Text::STRING AS "HASHTAG"
FROM "DEMO_DB"."PUBLIC"."TWITTER_MY_FAVORITE_CELEBRITIES_SRC_1206524140",
LATERAL FLATTEN(INPUT => RECORD_CONTENT:HashtagEntities)
WHERE
RECORD_CONTENT: HashtagEntities <> '[]';
Hope this was helpful. Did I miss something ? Let me know in the comments and I’ll add it in !
docker container ls -adocker-compose downdocker-compose down --volumesdocker rm $(docker ps -q -f status=exited)
ksqlDB is built on top of Kafka Streams, a lightweight, powerful Java library for enriching, transforming, and …

In this article, we will see how to generate test data for Kafka using Faker. We could also generate test data using …